Welcome to Part 9 of our grand FactoryTwoFour Porsche 911 Backdate Build! Every
month we're going to update you on the broken bolts and knuckles of this
project as we turn our Miami Vice 80's Porsche into a unicorn 1972 RS 2.7. If
you're just joining us, you can catch upon the series here.
I’ll come right out and say it: upholstery and interior work isn’t really my forte. It takes me a fortnight to wrap anything in leather well enough that it doesn’t look like a prop for The Texas Chainsaw Massacre. Planning all those little triangle cuts you make to wrap around edges and avoid folds and creases – my brain just doesn’t seem capable of working in a way to predict them. That’s why, after much trial and error, I decided to send the Porsche Backdate Project’s interior off to be done professionally by an adult with an actual attention span.
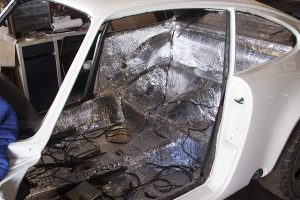
So while that little failure still tasted of ash in my mouth, I tackled installing the headliner. This is the so-called toughest DIY job on a Porsche 911 coupe. Half that difficulty comes from the fact that said DIY restorer needs to remove the glass, the upper upholstery, the sunroof, the dash, etc. – pretty much the entire interior above the carpet. “Lucky” for me I bought a very trashed donor car with no interior anyway, and I’ve already removed everything else for the paint job. So all I had left was the second half of this impossible job: stretching it perfectly and symmetrically across the interior roof without a single crease or fold.
Honestly, for all the paragraphs written in all the books, blogs, and forums about how tough it is to do the headliner at home, and that you DEFINITELY need an assistant, I found it relatively easy to tackle myself over three days. If you are doing this yourself in a classic car, just work slow and be prepared to start over several times. Beyond that, it’s truly not a bad job to do. Headliner done, as well as gluing in all the sound proofing and insulation panels, it was time to move on the actual biggest project for our backdate interior – a little something custom I had cooked up in a fever dream when I first got the car.
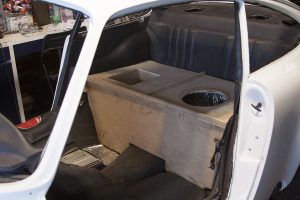
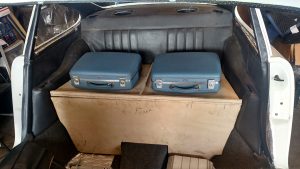
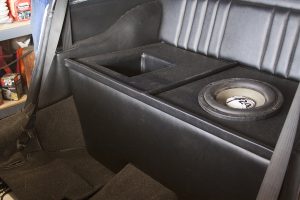
Looking at how dainty the rear seats on a classic 911 are, and how far I need to have my seat back to fit, the two rear seats were clearly going to be useless. Years ago, as an awful 25 year old with spiky hair and a love of dubious fashion, I owned a third-gen Mazda RX-7. It was a two-seater with little storage compartments where rear seats would go. In four years of ownership I only needed more than two seats once, and that was an emergency. I was and am confident that I would not miss rear seats in this car. But alas, all the rear seat delete/storage compartments you can buy or build yourself were either ugly or more money than my paintjob, and all of them opened the “wrong” way – from the front like a glove box rather than the logical top. So clearly, I had to design and build my own custom solution. Because this project isn’t already one year and $10,000 over budget…
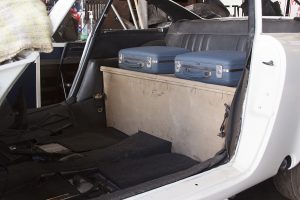
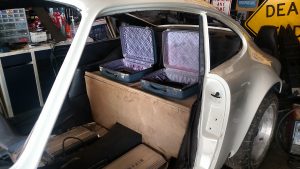
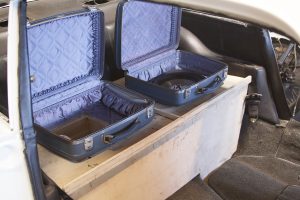
I’ve always liked the look of interior-matching car luggage held down by belts. It is just instant old-school cool. So my dumb idea was this: make a rear shelf with top-mounted storage bins, and have a pair of custom suitcases be the lids to those compartments. I know what you’re thinking: I’m a genius. Or an idiot.
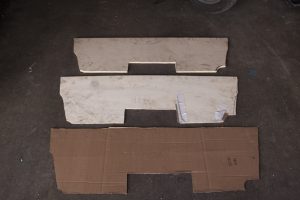
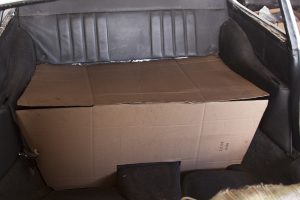
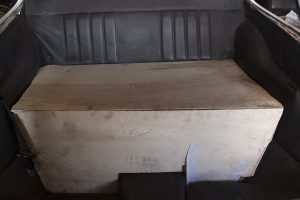
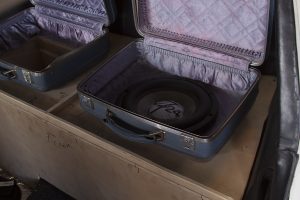
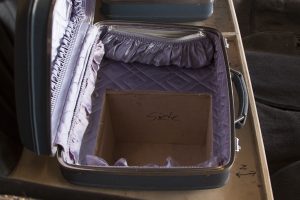
Over the course of two days, I mocked up my idea in cardboard, then in very thin plywood, and finally in ½ inch wood pieces. I determined along the way that this would be the optimal place to put the subwoofer of my over-enthusiastic stereo I ripped out of my RX-7. Once every edge of the shelf was massaged to fit and allow room for being upholstered, it was sent off to the professionals because, as I’ve already said, fabric wrapping is beyond me.
Also sent off were my very sorry and very cracked dash and miscellaneous cabin pieces all needing to be matched to the dash. Dropping everything off at the upholstery shop, it was discussed and determined that vinyl rather than real leather would be the best option for longevity. I was fully prepared to go full leather (aren’t I always?), and have seen arguments for and against, but at the end of the day I’ll take the recommendation of the expert.
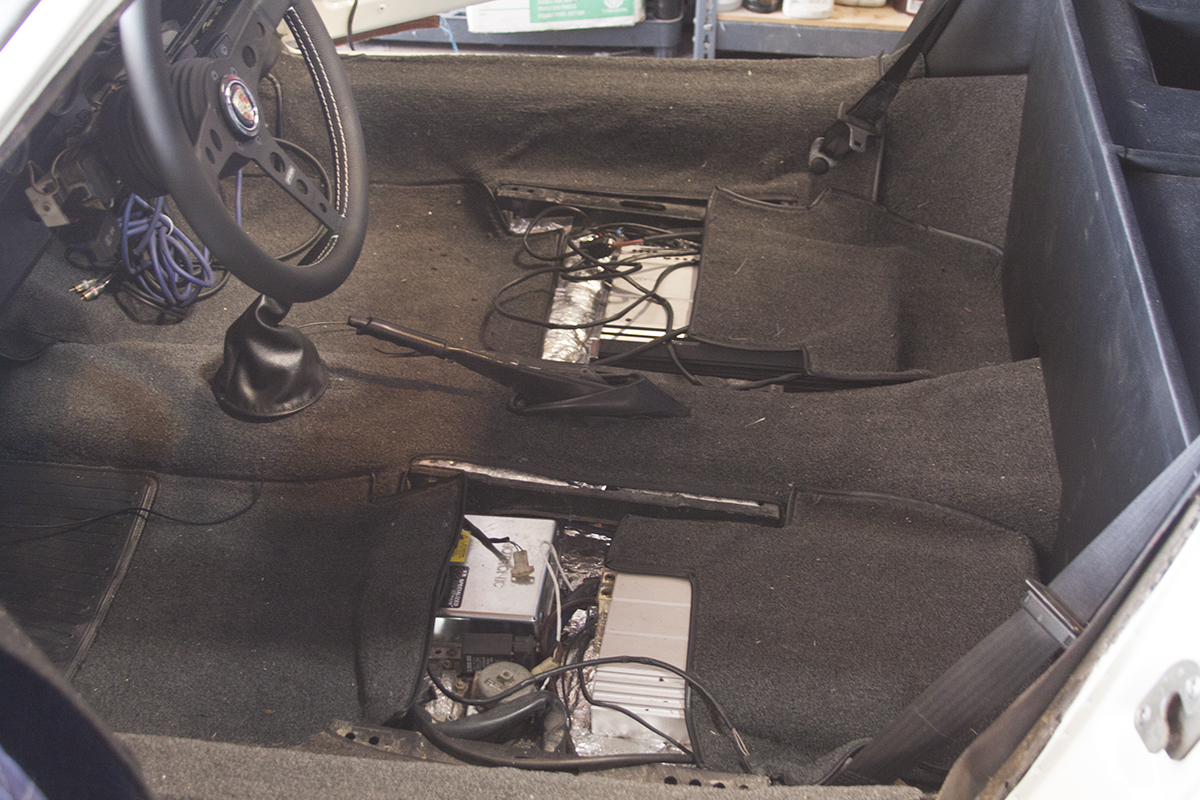
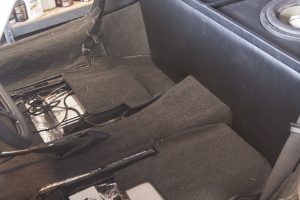
While the interior pieces were out of the car, I laid out the stereo system amplifiers and wires in preparation for hiding everything under the carpet. Once all the wires were run, it was time to lay down the charcoal carpets I chose. This was relatively easy as all the pieces were pre-cut and edged – like a giant fabric puzzle. There was no diagram or instructions included with this RS carpet kit so I had to wing it and refer to online pictures to figure it out. I still have lots of extra pieces left over, but oh well…
With that done all that remained for the interior, and the whole car really, was just reassembly. Adult Legos. The project is going to move rapidly towards completion now as I bolt everything on. The end-game has begun.

If you would like to follow the nitty gritty details of this build, they are
posted on a Porsche technical forum here.